How to light charcoal

Here are a couple of quick and easy ways to light charcoal for your stove. First, cut the charcoal to fit into your stove. A small hatchet or hammer and chisel will come in handy. In these photos, I'm using rod-shaped, "green" charcoal. If you have smaller pieces of charcoal that don't need to be broken down to fit nicely in your stove, you can skip this step.
Make sure you prepare enough charcoal to almost fill your stove plus enough to add later for as long as you plan your tea session to last. After a few tries, you'll know just how much you need.

Below: After cutting the charcoal, I'm making sure it fits nicely in my stove. Now it is ready to light. To light the charcoal, I will take it out of my stove again and light it over a gas camping stove. Once it's lit, I'll put it back in using metal chopstics. Do not use a torch to light the charcoal while its in the stove. The sudden, uneven and intense heat from the torch will stress the clay. This could cause the stove to crack.

A gas burner or torch works really well for lighting charcoal. I use a camping stove with a wire mesh on top to support the charcoal. I lay the charcoal on the mesh and light the stove. After 5 minutes, I use metal chopsticks to rotate each piece of charcoal 180° horizontally to make sure at least one side of each piece of charcoal is completely lit. I only do this with the "green" charcoal becaue its a little harder to light than regular charcoal. Alternatively, you can put the charcoal in a metal tray and light it with a torch. This takes a little bit more effort but also works.

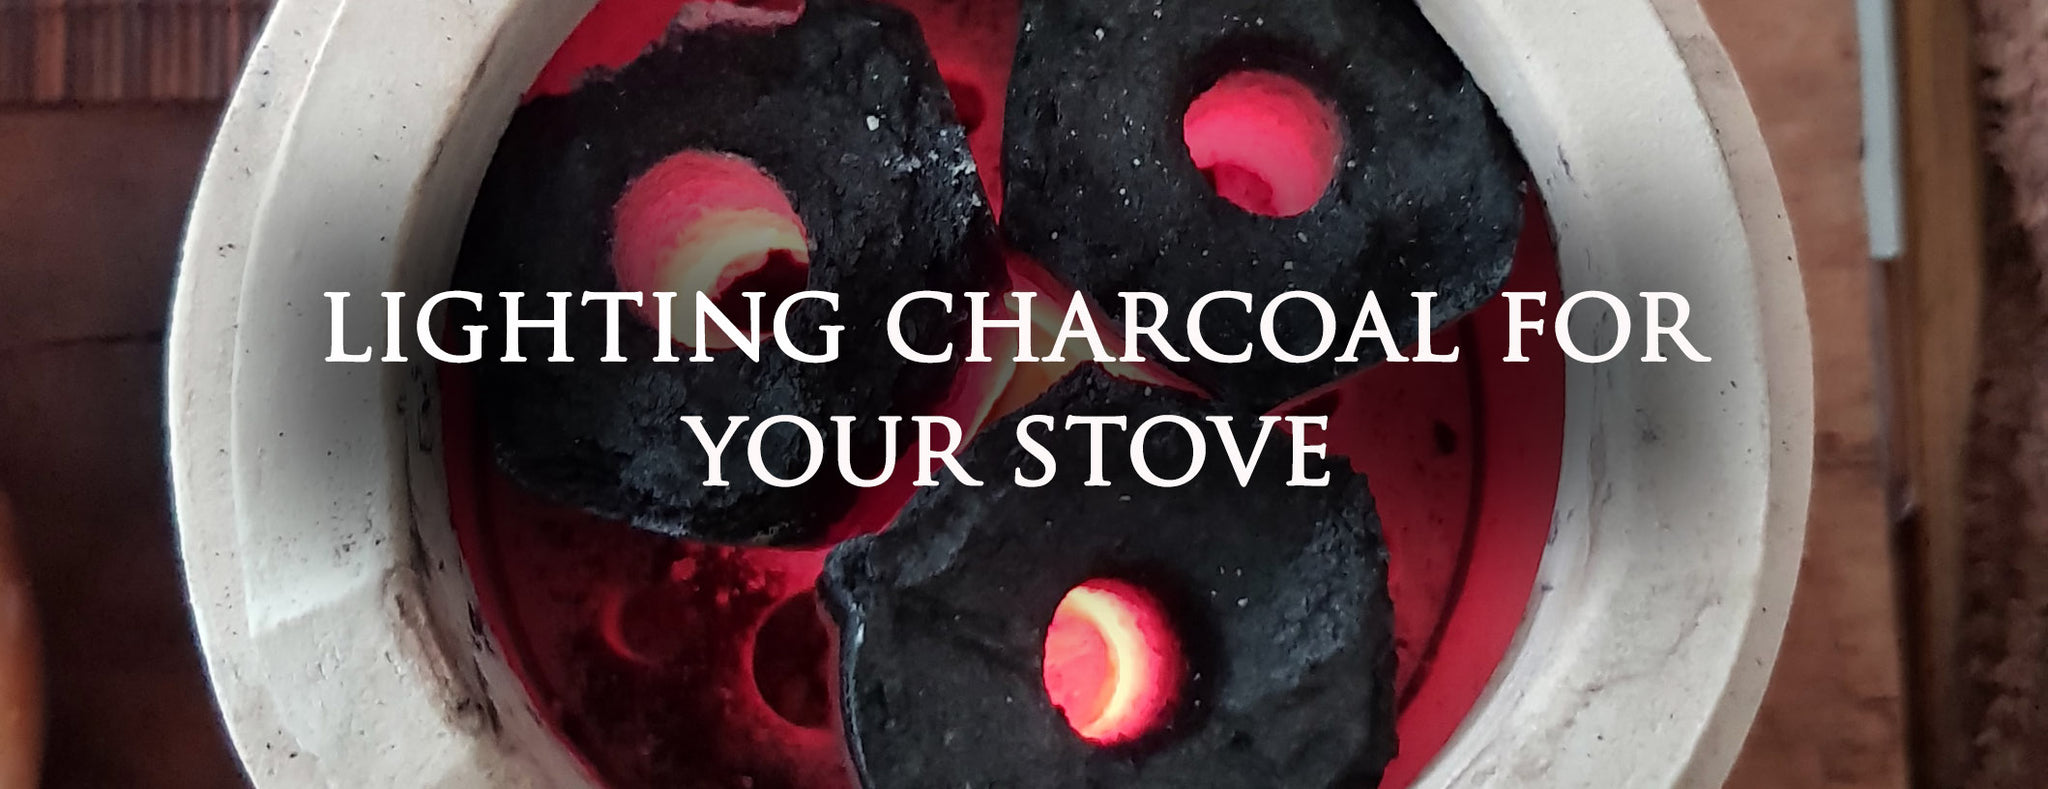
After the charcoal is well lit you'll be able to see white ash appearing on the lit end. The glowing ember should be visible. The charcoals should be emitting good amount of heat. Using metal chopsticks, carefully load the lit charcoal into the stove. In this case since I'm using the green charcoal, I'll put the lit end facing down.
Once the lit charcoal is loaded into your stove, you'll need to quickly move your stove to your tea table before it gets too hot. After 1 minute it may already be too hot to touch with your bare hands. Gloves may come in handy, although I've never needed them. Also, you may need to put down a peice of wood, tray or plate between your stove and your tea table to prevent any burning that may occur from the hot stove. It will generate a good amount of heat after burning for a period of time.

Below: Charcoals are lit and ready to boil water. The advantage of "green" charcoal is that a stove full of it will provide consistent heat to boil water for about an hour and they're easy to use. With hardwood charcoals, you will need to keep the fire going by adding more charcoal when necessary.
There's a trick to adding charcoal without the fire going out. The best time to add charcoal is when the water has come to a boil. At this time the fire is hottest. When you add charcoal at this time, it will ignite easily. The heat will die down for a few minutes, then will return as the new pieces of charcoal have fully ignited. If you add charcoal when the heat is already declining, it may snuff out the fire or take a long time to ignite and get hot again. This part takes experience. Getting it right takes practice. Just make sure you're adding charcoal when the fire is hottest and not when the heat is declining or the charcoal is almost burned out. The first few times may be frustrating as you may fail to get your water to a good boil. If you follow the above tips, you should be able to a good a nice hot stove going after a few tries.

If you finish your tea session before the fire goes out, move the stove to a safe area free from flammable materials to burn itself out. Don't put water on the hot stove to cool it down. This will cause it to crack.
Make sure you never leave the lit stove unattended. Always exercise caution while using the stove and boiling water. Using a charcoal stove and kettle to boil water is a really enjoyable way to enjoy tea. It does take time to master, so please be patient with yourself in the beginning. If you take the time to practice, you'll figure it out.
I hope the above information will help you improve your experience using a clay stove and charcoal. If you have questions, please write them below in the comments or contact me at thejadeleaf@gmail.com
Cheers,
Emilio
Leave a comment
Comments will be approved before showing up.
Also in News

Sourcing and pricing

Modern, eco-friendly & Sustainable

